KOTLIN TIP #6

OBJECT EXPRESSIONS

Object expressions allow for strict singleton definition so there’s no mistaking it for a class that can be instantiated. They also ensure that you do not have to store singletons somewhere like in the Application class or as a static class variable.

For example, if I have a utility class with static thread-related methods I want to access throughout the app:

import android.os.Handler
import android.os.Looper
// notice that this is object instead of class
object ThreadUtil {
fun onMainThread(runnable: Runnable) {
val handler = Handler(Looper.getMainLooper())
handler.post(runnable)
}
}


ThreadUtil is called later in the typical way you would call a static class method:

ThreadUtil.onMainThread(runnable)

This means there’s no more declaring a constructor as private, or having to figure out where the static instance is stored. Objects are essentially first class citizens of the language. In a similar way, we create objects instead of anonymous inner classes:


viewPager.addOnPageChangeListener(object : ViewPager.OnPageChangeListener {
override fun onPageScrollStateChanged(state: Int) {}
override fun onPageScrolled(position: Int, positionOffset: Float,
positionOffsetPixels: Int) {}
override fun onPageSelected(position: Int) {
bindUser(position)
}
})

Both of these do essentially the same thing — create a single instance of a class as a declared object.

KOTLIN TIP #5

COLLECTION FILTERING

Collections are dealt with quite often when working with an API. More often then not, you want to filter or modify the contents of that collection. By using Kotlin’s collection filtering, adding clarity and making your code more succinct. It’s easier to tell what your resulting list should contain with collection filtering like the following:

val users = api.getUsers()
// we only want to show the active users in one list
val activeUsersNames = items.filter {
    it.active // the "it" variable is the parameter for single parameter lamdba functions
}
adapter.setUsers(activeUsers)

Filtering a collection using the built-in Kotlin methods is very comparable to other functional programming languages too, such as Java 8 streams or Swift collection types. Being able to filter collections in a unified way helps when talking with team members about what operations need to be done to get a list down to the right elements to display.

KOTLIN TIP #4


DATA CLASSES

Data classes simplify classes, adding equals(), hashCode(), copy(), and toString() methods automatically. They clarify the intention of the model and what should go in it, separating pure data from business logic.

Take a look at this data class as an example:

data class User(val name: String, val age: Int)

That’s it. Nothing else is needed to make this class work. If you are using data classes with something like Gson or another JSON parsing library, you can create the default constructor with default values like so:

// Example with Gson's @SerializedName annotation
data class User(
@SerializedName("name") val name: String = "",
@SerializedName("age") val age: Int = 0
)


KOTLIN TIP #3

LAMBDAS

Lambdas reduce the overall lines of code in a source file and allow for functional programming. While lambdas are currently possible with Android, Kotlin takes them a step further by ensuring you don’t have to deal with Retrolambda or changing the way your build is configured.

For example, an on-click listener would look like:

button.setOnClickListener { view ->
startDetailActivity()
}

It even works with return values:

toolbar.setOnLongClickListener {
showContextMenu()
true
}

The Android SDK contains plenty of cases where you are setting a listener or implementing a single method. Lambdas work great in those circumstances.

KOTLIN TIP #2

CUSTOM GETTERS/SETTERS

Kotlin’s custom getters and setters use the structure of a model, but specify custom behavior to get and set the fields. When using custom models for certain frameworks, such as the Parse SDK, you are fetching values that are not actually local variables in the class but are stored and retrieved in some custom way, such as from JSON. By using custom-defined getters and setters, we can simplify the access:

@ParseClassName("Product")
class Product : ParseObject() {

    // getString() and put() are methods that come from ParseObject
    var name: String
        get() = getString("name")
        set(value) = put("name", value)

    var description: String
        get() = getString("description")
        set(value) = put("description", value)
}

Fetching these values would look similar to using property access syntax with other models:

val product = api.getProduct()
textDesciption.text = product.description

Now if your model needed to change from Parse to some other data source, your code would potentially only need to be changed in one place.


KOTLIN TIP #1

LAZY LOADING

There are several benefits to lazy loading. Lazy loading can result in faster startup time, since loading is deferred to when the variable is accessed. This is particularly useful in using Kotlin for an Android app as opposed to a server app. For Android apps, we want to reduce app startup time so that the user sees the app content faster, rather than sitting at an initial loading screen.

Lazy loading like this is also more memory efficient, as we only load the resource into memory if it is called upon. Memory usage is important on mobile platforms like Android since phones have limited, shared resources. For example, if you are creating a shopping app, and there is a possibility that users will only browse your selection, you could have the actual purchasing API be lazy-loaded:

val productsApi: ProductsApi by lazy {
val retrofit: Retrofit = Retrofit.Builder()
.baseUrl(API_URL)
.addConverterFactory(MoshiConverterFactory.create())
.build()
retrofit.create(ProductsApi::class.java)
}

By using lazy loading like this, if the user never attempts to check out in the app, you will never load the PurchasingApi, and therefore will not use up the resources it would take.

Lazy loading is also a good way to encapsulate initialization logic:

// bounds is created as soon as the first call to bounds is made
val bounds: RectF by lazy {
RectF(0f, 0f, width.toFloat(), height.toFloat())
}

As soon as the first reference to bounds is made, the RectF is created, using the view’s current width and height, saving us from having to explicitly create this RectF, then set it later on.

How to migrate Eclipse Android project to AndroidStudio module.

I decided to write this blog to show how to migrate an Eclipse project to android studio manually.

There is a video link at the bottom of this post which demonstrates the whole process, before that understanding the difference folder structure of android studio and eclipse is necessary,

With the recent stable release of Android Studio in December, it has replaced Eclipse as the standard Android development environment. All developers are advised to migrate to it, as the ADT Eclipse plugin will not be maintained and updated, and as of now, it is no longer supported.

In this post, I’ll have a quick look at the differences in the folder structure of the Eclipse projects and Android Studio modules.

Android Studio changes the terminology a bit. In Eclipse, you had workspaces with a number of projects and library projects in them. In Android Studio, this becomes a project with a number of modules and library modules. Apart from the names, they’re pretty much the same thing, but thanks to the mandatory Gradle build system, it tends to be more organized.

Many libraries no longer need to be copied into your workspace. Simply add a reference to the module’s build.gradle file, state the required version, and it will be automatically fetched from the remote repository, compiled and included without having to worry about it. No more hunting for Android support library JARs in the SDK folders, and no more manual Eclipse project opening nightmare. Many third-party libraries can be included in the same way with Gradle, which saves a lot of clutter. Your project folder will be neat and clean, and really only contain your own code.
Folder structure

refer below link for more details on  Gradle with android,
https://developer.android.com/tools/building/configuring-gradle.html

and migrating projects from Eclipse to Android Studio
https://developer.android.com/sdk/installing/migrate.html

Here’s a list of folders where your code and resources are stored compared to Eclipse,

   Eclipse                   Android Studio

Android manifest       [project]                 [module]/src/main
Assets                       [project]/assets      [module]/src/main/assets
Java source files       [project]/src            [module]/src/main/java
Resources                 [project]/res            [module]/src/main/res
Included JARs          [project]/libs            [module]/libs

Below screencast shows how easily an Eclipse project can be moved to Android Studio module manually.

Empty Mac OS Trash.

I was trying to empty my Mac Trash with Empty Securely option available with Finder,
Emptying the trash in OS X Finder can be a long process, especially If you have lots of items (like me). This is after some minutes.

Screen Shot 2015-08-09 at 11.29.05 PM

Solution 1:
Check to see that “Empty trash securely” is not set. This erases files multiple times, so it takes much longer to delete.

The setting is in Finder’s Preferences on the Advanced page. I’ve heard that sometimes a Snow Leopard upgrade accidentally sets this option.

Solution 2:

If you do it through the Terminal it is nearly always considerably faster:

rm -rf .Trash/*

Screen Shot 2015-08-09 at 11.25.06 PM

However it can be noted that this won’t delete files that appear in your Trash from external hard drives, other partitions, etc. Those files are stored at /Volumes/NAME_OF_DEVICE/.Trashes/USER_ID where USER_ID is your user ID. (Usually 501 on a single user system) and you’ll have to remove them using a second command. (sudo rm -rf /Volumes/*/.Trashes/501/* should do all of them for you)

As always when using rm -rf be completely sure the path you’ve typed into the Terminal is correct or you’re liable to delete much more than you mean to. (eg. a space before a * is never good)

As to why the Finder takes so long, the Finder does some extra work of deleting files from all the devices attached to a computer, overriding permissions if necessary (using a subprocess called Locum), file stats, among others.

———————————————————————————————————————————————————————————————-

rm: Remove files

-f          Attempt to remove the files without prompting for confirma-
tion, regardless of the file’s permissions.  If the file does
not exist, do not display a diagnostic message or modify the
exit status to reflect an error.
-R          Attempt to remove the file hierarchy rooted in each file
argument.  The -R option implies the -d option.  If the -i
option is specified, the user is prompted for confirmation
before each directory’s contents are processed (as well as
before the attempt is made to remove the directory).  If the
user does not respond affirmatively, the file hierarchy
rooted in that directory is skipped.

-r          Equivalent to -R.

———————————————————————————————————————————————————————————————–

Get more info about rm command by using info rm command in terminal.

To know other linux commands check https://proudgeekk.wordpress.com/2013/12/23/some-common-linux-commands/

Organizing Your Android Development Code Structure

Writing a medium to large Android app requires having code structure. In creating our latest Android development project, I came across a lot of problems handling the structure and then I searched and found a simple way of structuring as below that helped me out.

Java Code

I like to have separate files for each class in my Android projects, the only exception being AsyncTasks. Having this many java files means you have to have more packages than the base package. I ended up with a package for each type of main class. Each class is named ending with its type.

com.example

activities

Contains all the activities. Classes are all named with Activity at the end. That way, you can immediately know what it is when reading Java code that doesn’t have its full package name.

adapters

Contains all the adapters.

authenticator

Contains any class related to signing a user in. I create a local account and having all related classes together is very handy.

data

Contains all classes related to data management such as ContentProvider and SQLiteHelper.

data.migrations

Contains all of my SQLite migrations. I created a class for migrations, read about it here, and put them all in this package.

fragments

Contains all fragments.

helpers

Contains helper classes. A helper class is a place to put code that is used in more than one place. I have a DateHelper for instance. Most of the methods are static.

interfaces

Contains all interfaces.

models

Contains all local models. When syncing from an HTTP API I parse the JSON into these Java objects using Jackson. I also pull Cursor rows into these models as well.

preferences

Contains all classes for custom preferences. When creating the preferences I required a custom PreferenceDialog as well as a custom PreferenceCategory. They live here.

sync

Contains all classes related to syncing. I use a SyncAdapter to pull data from an HTTP API. In addition to the SyncAdapter a SyncService is required, so I created a package.

Layouts

The layouts folder can easily become disorganised since you can’t have any folders in it. This is a known issue and has been ignored for 4 years now. To get around this I name my layout files with a prefix depending on what they are for. This sorts them together in the android studio file listing.

R.layout

activity_

adapter_

fragment_

IDs

All of my IDs are snake_case. I had a project that was inconsistent with how IDs were named and it was a pain. Many projects seem to do mixedCase notation for IDs, but it seemed weird having the different styles in Java code depending on what type of resource it was, e.g. R.layout.snake_case vs R.id.mixedCase.

Values

For values I have a separate file for each type of resource, e.g. dimens.xml. This works out well for most of the values, except for strings. There are a large amount of strings in this app and having them all in the same file is pretty unusable. In this case I split out some of the strings into groups by their activity. This allows you to easily find a string if you’re looking at the activity already.

How do you structure your code for Android app development projects? Is there any better way to follow? Comment and let me know.

Android 5.0 features you need to know about.

Google’s latest update to its Android operating system delivers a ton of new features. Here are the tips and tricks you need to know about.

Google recently released Android 5.0 Lollipop, the largest Android update to date. The updated version of the popular mobile operating system is slowly making its way to older devices. Here are the new features in Android 5.0 Lollipop that you need to know about.

The new Material Design

The first thing you will notice after updating to Android 5.0 Lollipop is the redesigned interface. Google’s “Material Design” brings a cleaner, lighter look to the operating system.

materialistic design

materialistic design

A new lock screen

Notifications are now displayed directly on your device’s lock screen.

lock screen

lock screen

Hide sensitive content in notifications

Not a fan of having everything front and center? Notifications can be disabled or set to hide sensitive content.

Get longer battery life with battery-saver mode

A new feature in Android 5.0 Lollipop promises to squeeze 90 extra minutes of juice out of the battery in your device.

To enable the new battery-saver feature, enter Settings, click on Battery, tap the Menu button (that three vertical dot icon in the top right corner) and select Battery saver.

Hang a Do Not Disturb sign

The first time you change the alert volume on your device you will notice few new options just below the volume slider. These are part of a new featured called Priority mode.

Selecting “None” will disable all notifications, even your alarm clock. While “Priority” mode will show only notifications you have approved. Head to Settings, click Sound & Notifications and select Interruptions to approve select notifications.

You can now search Settings

Can’t find what you want in the Settings menu? Android 5.0 Lollipop now includes a search option specifically for settings.
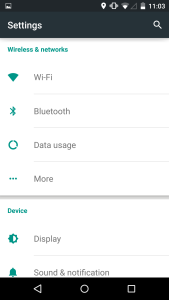
search settings

search settings

Add Trusted Devices

You can set a Bluetooth or NFC tag as a “Trusted Device.” When the device is in range of your phone, the security passcode or pattern won’t be required to unlock it. To set this feature up, head to Settings, select Security, followed by Smart Lockand Trusted Devices.

Note that the Smart Lock option will only be available if a security lock, such as a pattern or a passcode, is enabled on your device.

Use guest mode with friends

Share your phone with friends or family members? You can now create multiple user profiles to keep your personal apps, contacts and photos separate from theirs. There is also a guest mode for temporary users. New modes can be accessed and created by pulling down the Notification menu and tapping the person icon in the top right corner of the screen.
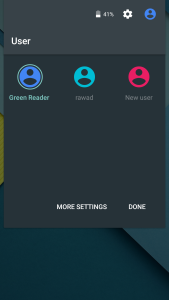
multiple users

multiple users

Keep apps Pinned

There are other options if you don’t want to enter guest mode every time you let someone play a game or use the dialer app. A new feature in Android 5.0 Lollipop lets you pin a specific app to the home screen.

The feature isn’t enabled by default, but you can turn it on by going to Settings, clicking on Security, selecting Screen pinning and tapping the On button.

To pin an app, tap on the overview button (it’s the square button along the bottom of your screen) and bring the app you want to pin to the front of the screen. At the bottom-right corner of the app overview will be a blue pin button. Tap on it and confirm the action. To unpin the app, press and hold the back button and overview button at the same time.

Access the improved Quick Settings

The Quick Settings menu in Android 5.0 Lollipop has been improved. There is now a slider so you can quickly adjust the brightness, an rotation lock option and a built-in flashlight, among other features.

You will see your alerts when pulling down the notification menu with a single finger. In order to reveal the Quick Settings menu from here, simply swipe down again with a single finger.

quick settings

quick settings

Quickly check your data usage

One of the new features in the Quick Settings menu lets you quickly check your data usage. Simply pull down the menu and tap the network icon. It’s as easy as that.

Adaptive brightness replaces auto brightness

Previous versions of Android included an automatic brightness feature, which would automatically adjust your brightness depending on your environment.

The feature has now been replaced with an “Adaptive brightness” mode. This is similar to the auto-mode, but you still have the ability to choose your own brightness. Once you have set a base brightness, the adaptive mode will then adjust it based on your surroundings.

Improved performance

One feature you won’t see on the surface of the Android 5.0 update is the move to the new Android Runtime, known as ART.

In short, the new runtime improves the performance of your device and helps optimize battery life.

High contrast text makes it easier to read

A new (and experimental) feature in Android 5.0 aims to make text easier to read. A high-contrast text mode can be enabled by going to Settings and clicking on Accessibility.

You can invert colors

You will also find an option to Invert Colors in the Accessibility settings. While it’s not for everyone, this option can also make it easier to read text at night.

Apps will remain in Overview after a restart

Did you know that apps in the Overview menu will stay in there even after you power down or restart your phone? It’s true, and it makes it easier to get back to the apps you were using.

Use ‘OK, Google’ everywhere

While you still can’t use the “OK, Google” command when the display is off (unless you own a Nexus 6, Moto X or Nexus 9), you can now use it inside of most apps on Android 5.0.

This can be enabled by going to Settings, clicking on Language & Input, followed by Voice input. Then, tap the Gear icon, click on “OK, Google” Detection and enable Google Now from any screen. You will have to train the feature by saying “OK, Google” three times, but once it’s complete you can then use the command from inside of most apps and on any screen.

After you plug your phone in, it will give you an estimate on how long it will take the battery to be fully charged.

google now

google now

More uses for NFC

The Android Beam sharing feature that was first introduced with Android 4.0 Ice Cream Sandwich has been improved with the release of Lollipop. Users could previously only share Web links, contact info, directions and YouTube videos, but now you can share anything with just a tap.

Simply select what you would like to share, place two Android phones with NFC back-to-back, and either tap the screen or choose Android Beam from the sharing menu.

Don’t let notifications interrupt your games

One of my favorite features in Android 5.0 is the new notification system. Notifications will no longer interrupt you when playing a game or watching a movie. Text messages, phone calls and other notifications will now briefly appear at the top of the screen. You can choose to act on the notification or simply swipe it away.

Check your battery stats

In addition to battery improvements, Android 5.0 gives you more information on your battery life. Going to Settings and selecting Battery will give you an estimated time of how much longer your battery will last.

Access Google’s Flappy Bird clone

The mobile game Flappy Bird took the world by storm in 2014. After reaching the top of the charts, the game was suddenly removed by its creator from the Google Play Store. As a homage to the game, Google added a Flappy Bird-inspired Android version as an Easter egg in Lollipop.

To access it, head to Settings, click on About Phone and tap “Android version” repeatedly. A lollipop will appear on your screen, a single tap will change the color of the tasty treat, while a long-press will open the game.
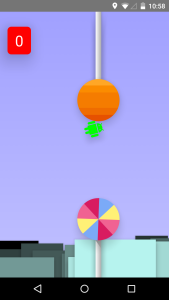
flappy bird clone in lollypop

flappy bird clone in lollypop

Vertical SeekBar for Android

Simple customized VerticalSeekBar which extends SeekBar also shows how to customize a view class in java.

/**
* @author hafsalrahman
*
*/
public class VerticalSeekBar extends SeekBar {
    public VerticalSeekBar(Context context) {
        super(context);
    }
    public VerticalSeekBar(Context context, AttributeSet attrs, int defStyle) {
        super(context, attrs, defStyle);
    }
    public VerticalSeekBar(Context context, AttributeSet attrs) {
        super(context, attrs);
    }
    protected void onSizeChanged(int w, int h, int oldw, int oldh) {
        super.onSizeChanged(h, w, oldh, oldw);
    }
    @Override
    protected synchronized void onMeasure(int widthMeasureSpec, int heightMeasureSpec) {
        super.onMeasure(heightMeasureSpec, widthMeasureSpec);
        setMeasuredDimension(getMeasuredHeight(), getMeasuredWidth());
    }
    protected void onDraw(Canvas c) {
        c.rotate(-90);
        c.translate(-getHeight(), 0);
        super.onDraw(c);
    }
    private OnSeekBarChangeListener onChangeListener;
    @Override
    public void setOnSeekBarChangeListener(OnSeekBarChangeListener onChangeListener){
        this.onChangeListener = onChangeListener;
    }
    private int lastProgress = 0;
    @Override
    public boolean onTouchEvent(MotionEvent event) {
        if (!isEnabled()) {
            return false;
        }
        switch (event.getAction()) {
        case MotionEvent.ACTION_DOWN:
            onChangeListener.onStartTrackingTouch(this);
            setPressed(true);
            setSelected(true);
            break;
        case MotionEvent.ACTION_MOVE:
            super.onTouchEvent(event);
            int progress = getMax() - (int) (getMax() * event.getY() / getHeight());
             
            // Ensure progress stays within boundaries
            if(progress < 0) {progress = 0;}
            if(progress > getMax()) {progress = getMax();}
            setProgress(progress);  // Draw progress
            if(progress != lastProgress) {
                // Only enact listener if the progress has actually changed
                lastProgress = progress;
                onChangeListener.onProgressChanged(this, progress, true);
            }
             
            onSizeChanged(getWidth(), getHeight() , 0, 0);
            setPressed(true);
            setSelected(true);
            break;
        case MotionEvent.ACTION_UP:
            onChangeListener.onStopTrackingTouch(this);
            setPressed(false);
            setSelected(false);
            break;
        case MotionEvent.ACTION_CANCEL:
            super.onTouchEvent(event);
            setPressed(false);
            setSelected(false);
            break;
        }
        return true;
    }
    public synchronized void setProgressAndThumb(int progress) {
        setProgress(progress);
        onSizeChanged(getWidth(), getHeight() , 0, 0);
        if(progress != lastProgress) {
            // Only enact listener if the progress has actually changed
            lastProgress = progress;
            onChangeListener.onProgressChanged(this, progress, true);
        }
    }
    public synchronized void setMaximum(int maximum) {
        setMax(maximum);
    }
    public synchronized int getMaximum() {
        return getMax();
    }
}

It can be used from XML as below

<com.hafsal.flag.VerticalSeekBar
        android:id="@+id/calculatorVerticalSeekBar"
        android:layout_width="wrap_content"
        android:layout_height="fill_parent"
        android:layout_gravity="bottom"
        android:max="20"
        android:progress="0" />

Git command to show origin repo

 refer Git Simple Guide.

git remote show origin

git remote show origin displays info for your remote origin repo. I typically use this when I want to get the URL or the remote repo.

sh-3.2# git remote show origin
* remote origin
Fetch URL: /Users/hafsalrahman/Dropbox/Git/testapp.git
Push  URL: /Users/hafsalrahman/Dropbox/Git/testapp.git
HEAD branch: master
Remote branch:
master tracked
Local ref configured for 'git push':
master pushes to master (fast-forwardable)
sh-3.2#


Git simple guide

I would like to share some basic information about the best and geeky version controlling system I’ve ever used.

What is Git?

GIT is an open-source version controlling system which you can use to maintain code for your project. It helps you to save your project at different versions so that you can retrieve a previous version of your project without any problem

Git allows a team of people to work together, all using the same files. And it helps the team cope with the confusion that tends to happen when multiple people are editing the same files.

The git basics tutorial provides a succinct overview of the most important Git commands.


 Git basic command line commands


git init

The git init command initializes a new Git repository.

Usage

git init

Create an empty Git repository in the specified directory. Running this command will create a new folder called containing nothing but the .git subdirectory.

git init –bare

Initialize an empty Git repository, but omit the working directory. Shared repositories should always be created with the –bare flag.

Central repositories should always be created as bare repositories because pushing branches to a non-bare repository has the potential to overwrite changes.


git clone

The git clone command creates a copy of an existing Git repository.

git clone

Clone the repository located at onto the local machine. The original repository can be located on the local filesystem or on a remote machine accessible via HTTP or SSH.

Usage

git clone

Clone the repository located at into the folder called on the local machine.


git config

The git config command is a convenient way to set configuration options for your Git installation.

Usage

git config user.name

Define the author name to be used for all commits in the current repository. Typically, you’ll want to use the –global flag to set configuration options for the current user.

#To configure the name of the author.

git config –global user.name

#To configure the email address of the author.

git config –global user.email


 Recording Snapshots


git add

The git adds command moves changes from the working directory to the staging area. This gives you the opportunity to prepare a snapshot before committing it to the official history.

Usage

//To stage all changes in for the next commit.

git add . 

Here ‘.’ represents all files in the current directory.


git commit

The git commit takes the staged snapshot and commits it to the project history. Combined with git add, this defines the basic workflow for all Git users.

Usage

git commit

Commit the staged snapshot. This will launch a text editor prompting you for a commit message. After you’ve entered a message, save the file and close the editor to create the actual commit.

git commit -m “commit message”

Commit the staged snapshot, but instead of launching a text editor, use as the commit message.

git commit -a

Commit a snapshot of all changes in the working directory. This only includes modifications to tracked files.


 Inspecting a Git Repository


git status

The git status command displays the state of the working directory and the staged snapshot. You’ll want to run this in conjunction with git add and git commit to see exactly what’s being included in the next snapshot.

Usage

git status

List which files are staged, unstaged, and untracked.


git log

The git log command lets you explore the previous revisions of a project. It provides several formatting options for displaying committed snapshots.

Usage

git log

Display the entire commit history using the default formatting. If the output takes up more than one screen, you can use Space to scroll and q to exit.

git log -n

Limit the number of commits by . For example, git log -n 3 will display only 3 commits.

git log —oneline

Condense each commit to a single line. This is useful for getting a high-level overview of the project history.

git log —stat

Along with with the ordinary git log information, include which files were altered and the relative number of lines that were added or deleted from each of them.

git log -p

Display the patch representing each commit. This shows the full diff of each commit, which is the most detailed view you can have of your project history.


#Thank you all for reading my blog please have a try with what you have learned.

http://try.github.io/

KOTLIN TIP #7

GLOBAL CONSTANTS

Kotlin allows you to define constants that span across an entire app in one place (if applicable). Typically, constants should have their scope reduced as much as possible, but when scope needs to be global this is a great way to do so without having to go through a constants class.

import android.support.annotation.StringDef

// Note that this is not a class, or an object
const val PRESENTATION_MODE_PRESENTING = "presenting"
const val PRESENTATION_MODE_EDITING = "editing"

These can be used as constants anywhere in your project:

Keep in mind that constants should be kept to as small a scope as possible to reduce complexity. If you have a value that only relates to the user class, put the value there in a companion object instead.

SCRUM Agile Methodology

Introduction to SCRUM

Scrum is an agile way to manage a project, usually software development. Agile software development with Scrum is often perceived as a methodology; but rather than viewing Scrum as methodology, think of it as a framework for managing a process.

Common failures which SCRUM cures:

  • Chaos due to changing requirements – the real or perceived requirements of a project usually change drastically from the time the product is designed to when it is released. Under most product development methods, all design is done at the beginning of the project, and then no changes are allowed for or made when the requirements change.
  • Unrealistic estimates of time, cost, and quality of the product – the project management and the developers tend to underestimate how much time and resources a project will take, and how much functionality can be produced within those constraints. In actuality, this usually cannot be accurately predicted at the beginning of the development cycle.
  • Developers are forced to lie about how the project is progressing – When management underestimates the time and cost needed to reach a certain level of quality, the developers must either lie about how much progress has been made on the product or face the indignation of the management.

Benefits of using SCRUM:

  • Higher productivity. The best architectures, requirements, and designs emerge from self-organizing teams
  • Higher quality. At predetermined intervals, our team reflects on becoming more effective, then tunes and adjusts accordingly
  • Reduced time-to-market
  • Improved Client satisfaction
  • Increased job satisfaction
  • More engaged employee

SCRUM has been successfully employed by hundreds of different companies in many different fields, with outstanding results.

You will find many similarities between SCRUM and Extreme Programming, but one of the major differences is that SCRUM is a fairly general set of guidelines that govern the development process of a product. For this reason, it is often used as a “wrapper” for other methodologies, such as XP or CMM (Capability Maturity Model) – that is, it is used to guide the overall process of development when using these other methodologies.

SCRUM Values.

The SCRUM values are derived from the Agile values of software development.

  • Individuals and interactions over processes and tools – processes and tools are helpful, but they will do you no good if the team does not communicate and collaborate in a constructive fashion.
  • Working software over comprehensive documentation – documentation is important, but what’s most important is to have working software.
  • Customer collaboration over contract negotiation – you are not just looking to get a contract and get the money that way – you are solving the customer’s problem.
  • Responding to change over following a plan – if the requirements or perceived requirements changed, so should the plans and design.

The SCRUM Process.

 General SCRUM Process

The scrum process has 3 main phases.


Planning.

In this phase, the project is planned and high-level design decisions are made.

Sprint Cycle.

The SCRUM Sprint Cycle

The sprint cycle is an iterative cycle of about 3-4 weeks, in which the actual development of the product is done. It starts out with a Sprint Planning Meeting to decide what will be done in the current sprint. Then the development is done. A sprint is closed with a Sprint Review Meeting where the progress made in the last sprint is demonstrated, the sprint is reviewed, and adjustments are made to the project as necessary.

The sprint cycle is repeated until the product’s development is complete. The product is complete when the variables of time, quality, competition, and cost are at a balance.

  • Develop the product further – implement, test, and document.
  • Wrap up the work – get it ready to be evaluated and integrated.
  • Review the work done in this sprint.
  • Adjust for any changes in requirements or plans.

Closure

In this phase, the product’s development is brought to a close, and the product is released.

The Scrum Team

The SCRUM team consists of 2 groups – the interested team, which consists of people who are interested, but who will not be doing the work, and the working team – people who are interested and will be doing the work on the project.

A team typically has no more than 6-9 working members, although SCRUM has been successfully used with more members. If there are more members than manageable, the project should be broken into multiple sub-projects, each focusing on one, self-contained area of work (one for QA, one for documentation, etc.). There should be people to act as bridges – that is, to attend the meetings of more than one SCRUM team, and act as a communication bridge between the teams. Members of teams that are closely related/involved with each other should sit in on the other teams’ SCRUM meetings.

The leader (SCRUM Master)

The team’s leader is called the Scrum Master. He should be one of the members of the working team – that is, he should be one of the people who is actually doing the work on the project. The SCRUM Master measures progress, removes impediments, and leads the team meetings.

Commonly Used Terms

Sprint

The product is developed in a series of 1-to-4-week iterations, or sprints. Before a sprint is begun, a Sprint Planning Meeting is held to determine what features are to be implemented in that sprint. The sprint has 4 major steps:

  • Develop the product further – implement, test, and document.
  • Wrap up the work – get it ready to be evaluated and integrated.
  • Review the work done in this sprint.
  • Adjust for any changes in requirements or plans.

Product Backlog

A prioritized list of all the desired changes to the product being developed put together by the product owner. See Figure 2.

Sprint Backlog.

A list with items that will be completed in the current sprint, taken from the product backlog. See Figure 2.

Daily SCRUM Meeting

A 15-minute SCRUM meeting is held every day. The SCRUM Master asks the three questions, and all members of the team and interested parties take part and give feedback. The meeting should be held at the same place every time so that people know where to go.

Unit Testing

A unit test is an automated test that ensures that the functionality required for a certain area of a project is implemented and that there are no breaking changes that have not been taken into consideration.

Impediment

Impediments are things that get in the way of the progress of the project. The SCRUM Master is responsible to look for and remove these obstacles so that they do not slow down or impair the project.

3 Questions

The Scrum Master asks the developers 3 important questions at every SCRUM meeting:

  1. What have you accomplished since the last meeting?
  2. Are there any obstacles in the way of meeting your goal?
  3. What will you accomplish before the next meeting?

Product Owner

The person who commissions the project, and defines the requirements and priorities for the product.

Sprint Planning Meeting

A meeting at the beginning of a sprint where the sprint is planned. Items from the Product Backlog are selected to be completed in the sprint, based on the priorities set by the Product Owner

Sprint Review Meeting

A sprint is closed with a Sprint Review Meeting where the progress made in the last sprint is demonstrated, the sprint is reviewed, and adjustments are made to the project as necessary.

Advantages of Scrum

The sprint process allows for “good enough” development that results in a saleable product even while the project is in full swing. This incremental delivery system shortens the time to market and may result in higher revenue, as each completed backlog represents a new release of the product. In addition, reviewing each sprint before moving to the next means that testing is conducted throughout the process, which allows teams to change the scope or direction of the project at any point. Although the deadline and budget are fixed variables, the project requirements are not. In fact, stakeholders and participants anticipate changes along the way. The product owner’s involvement in the project management process facilitates these changes.

Disadvantages of Scrum

It can be difficult for the Scrum master to plan, structure and organize a project that lacks a clear definition. In addition, frequent changes, frequent product delivery and uncertainty regarding the precise nature of the finished product make for a rather intense project life cycle for everyone involved. Furthermore, the daily Scrum meetings and frequent reviews require substantial resources. A successful project depends on the maturity and dedication of all participants, and their ability to maintain consistently high levels of communication through each backlog and review.

Source of info: Internet